计算机 3D 图形的历史可以追溯到 20 世纪 60 年代,几乎和计算机本身的历史一样长。它被广泛应用于工程、教育、培训、建筑、金融、销售、市场、博彩、娱乐等各个领域。曾经 ,3D 图形只能用计算机软件渲染。如今,所有的计算机和移动设备都搭载了 3D 图形处理硬件,普通智能手机甚至有着比五年前的专业图形工作站更为优秀的图形处理能力。更重要的是现代 Web 浏览器也支持了 3D 渲染,相比昂贵的 3D 专用渲染 件,浏览器显然更普遍,更易于获取,并且是免费的。
// once everything is loaded, we run our Three.js stuff. functioninit() { // create a scene, that will hold all our elements such as objects, cameras and lights. var scene = new THREE.Scene();
// create a camera, which defines where we're looking at. var camera = new THREE.PerspectiveCamera(45, window.innerWidth / window.innerHeight, 0.1, 1000);
// create a render and set the size var renderer = new THREE.WebGLRenderer(); renderer.setClearColorHex(); renderer.setClearColor(new THREE.Color(0xeeeeee)); renderer.setSize(window.innerWidth, window.innerHeight);
// show axes in the screen var axes = new THREE.AxisHelper(20); scene.add(axes);
// create the ground plane var planeGeometry = new THREE.PlaneGeometry(60, 20); var planeMaterial = new THREE.MeshBasicMaterial({ color: 0xcccccc }); var plane = new THREE.Mesh(planeGeometry, planeMaterial);
// rotate and position the plane plane.rotation.x = -0.5 * Math.PI; plane.position.x = 15; plane.position.y = 0; plane.position.z = 0;
// add the plane to the scene scene.add(plane);
// create a cube var cubeGeometry = new THREE.BoxGeometry(4, 4, 4); var cubeMaterial = new THREE.MeshBasicMaterial({ color: 0xff0000, wireframe: true }); var cube = new THREE.Mesh(cubeGeometry, cubeMaterial);
// position the cube cube.position.x = -4; cube.position.y = 3; cube.position.z = 0;
// add the cube to the scene scene.add(cube);
// create a sphere var sphereGeometry = new THREE.SphereGeometry(4, 20, 20); var sphereMaterial = new THREE.MeshBasicMaterial({ color: 0x7777ff, wireframe: true }); var sphere = new THREE.Mesh(sphereGeometry, sphereMaterial);
// position the sphere sphere.position.x = 20; sphere.position.y = 4; sphere.position.z = 2;
// add the sphere to the scene scene.add(sphere);
// position and point the camera to the center of the scene camera.position.x = -30; camera.position.y = 40; camera.position.z = 30; camera.lookAt(scene.position);
// add the output of the renderer to the html element document.getElementById('WebGL-output').appendChild(renderer.domElement);
// render the scene renderer.render(scene, camera); } window.onload = init;
var planeGeometry = new THREE.PlaneGeometry(60, 20); var planeMaterial = new THREE.MeshLambertMaterial({ color: 0xffffff }); var plane = new THREE.Mesh(planeGeometry, planeMaterial); plane.receiveShadow = true;
1 2 3 4 5
// add spotlight for the shadows var spotLight = new THREE.SpotLight(0xffffff); spotLight.position.set(-40, 60, -10); spotLight.castShadow = true; scene.add(spotLight);
因为渲染阴影比较耗费性能,所以默认关闭,需要做如下修改:
1 2 3 4 5
// create a render and set the size var renderer = new THREE.WebGLRenderer(); renderer.setClearColor(new THREE.Color(0xeeeeee, 1.0)); renderer.setSize(window.innerWidth, window.innerHeight); renderer.shadowMapEnabled = true;
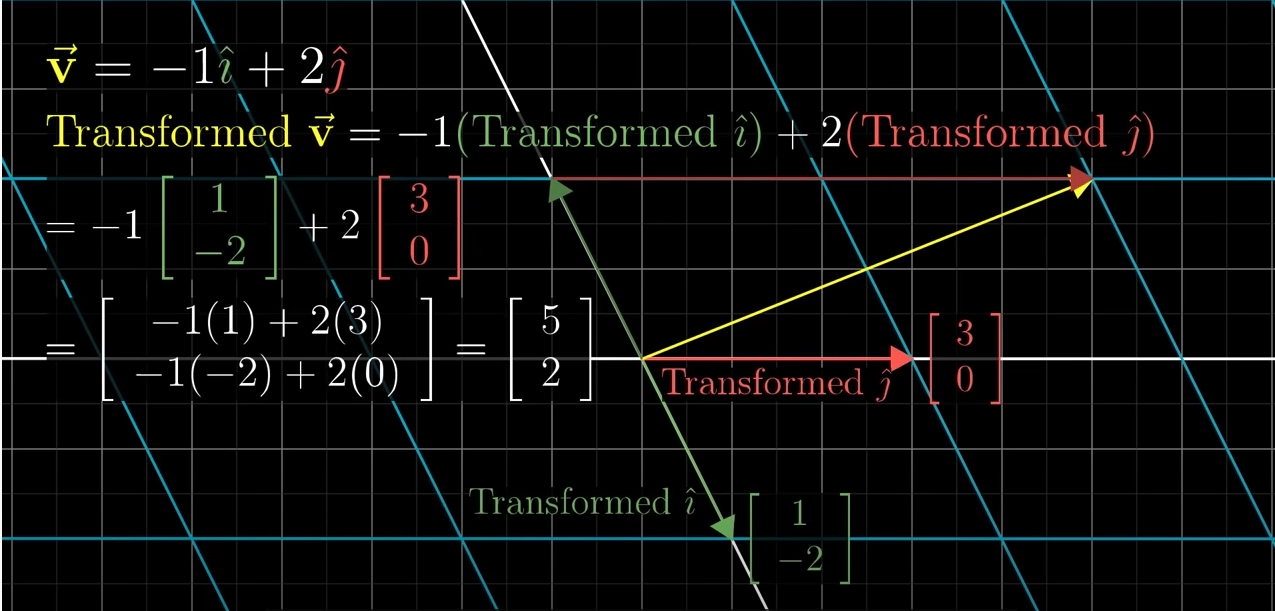
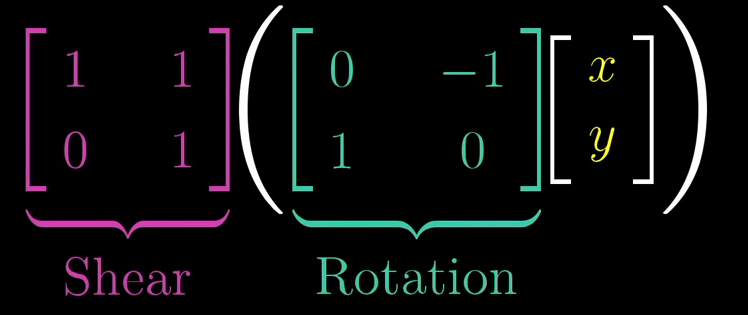
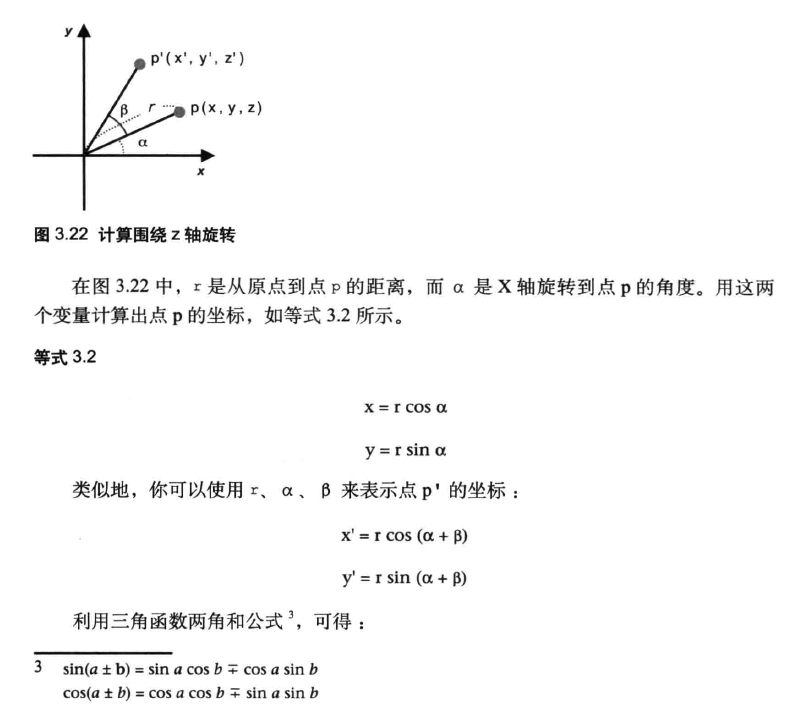
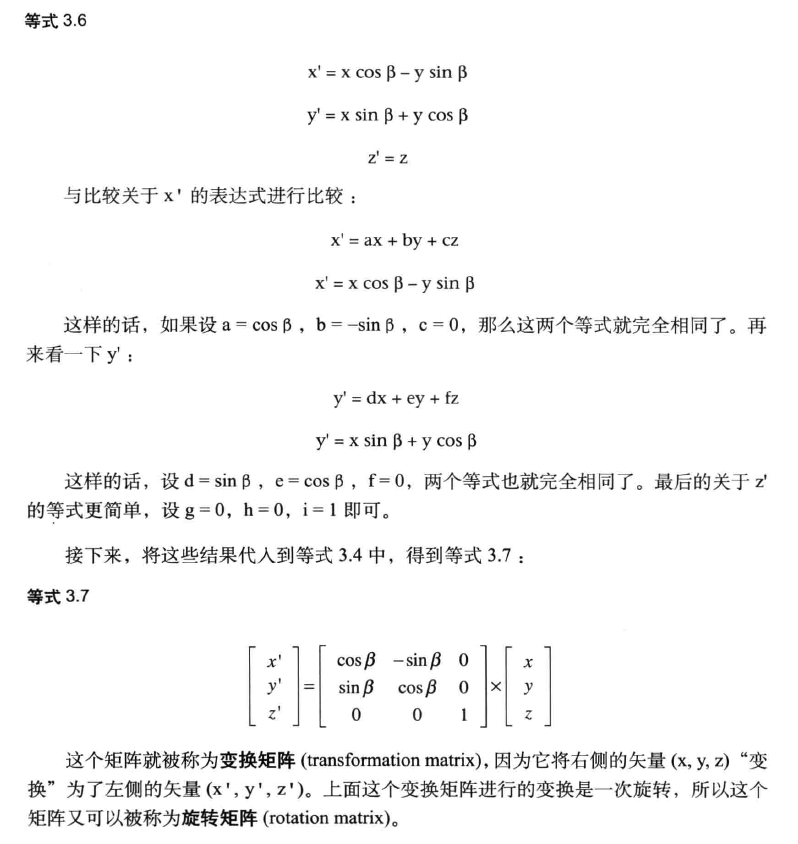
二维旋转矩阵直观的理解方式是:三个基向量 i,j,k :[1,0,0],[0,1,0],[0,0,1],因为线性变换的本质是基向量的变化,在二维平面中 z 轴方向不发生变化,而新的基向量的坐标其实是在原始坐标系的投影,我们直接想象如果逆时针旋转 90 度,可以直接想出原来的 x 轴到了原来 y 轴位置,原来 y 轴到了原来-x 轴位置。单位向量的坐标就是[0,1,0],[-1,0,0],[0,0,1],是不是和上面矩阵值一致呢
相机、透视、视口、投影
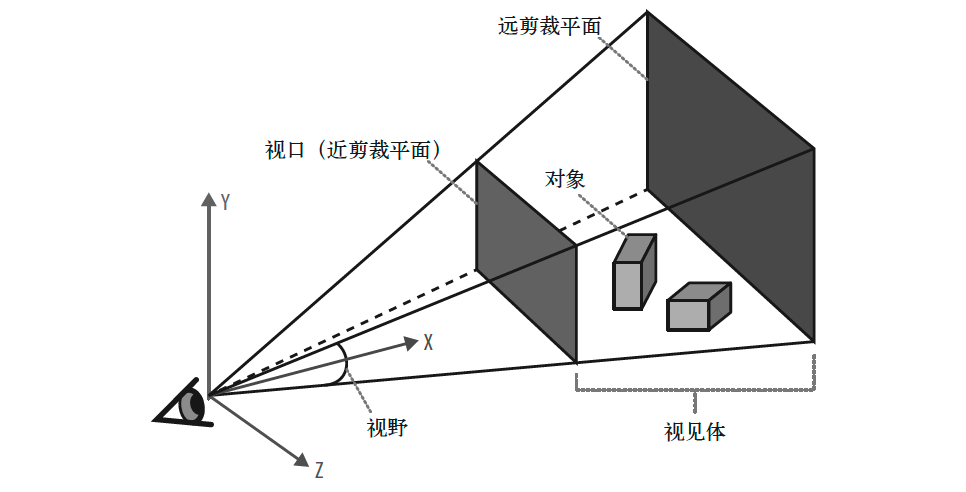
3D 系统通常使用相机(camera)概念来描述用户查看渲染好场景的观察点。相机定义了用户相对于场景的位置和朝向,它具备现实中相机的属性,如视野的尺寸,它定义了透视(perspective,即远处物体看起来小)。相机通常用一对矩阵表示。第一个矩阵定义相机位置和方向,类似变换矩阵。第二个矩阵表示 3D 到 2D 绘制坐标转换,称为投影矩阵(projection matrix)。这些细节一般工具都封装好了,只需要对准、拍摄。
下图描述了相机、视口、透视的概念。眼睛代表相机位置,x 轴表示相机指向,两个矩形代表近剪裁平面和远剪裁平面。两个平面间定义了 3D 空间子集的范围,通称视锥体或视见体。只有位于视锥体中的物体才会真正被渲染。
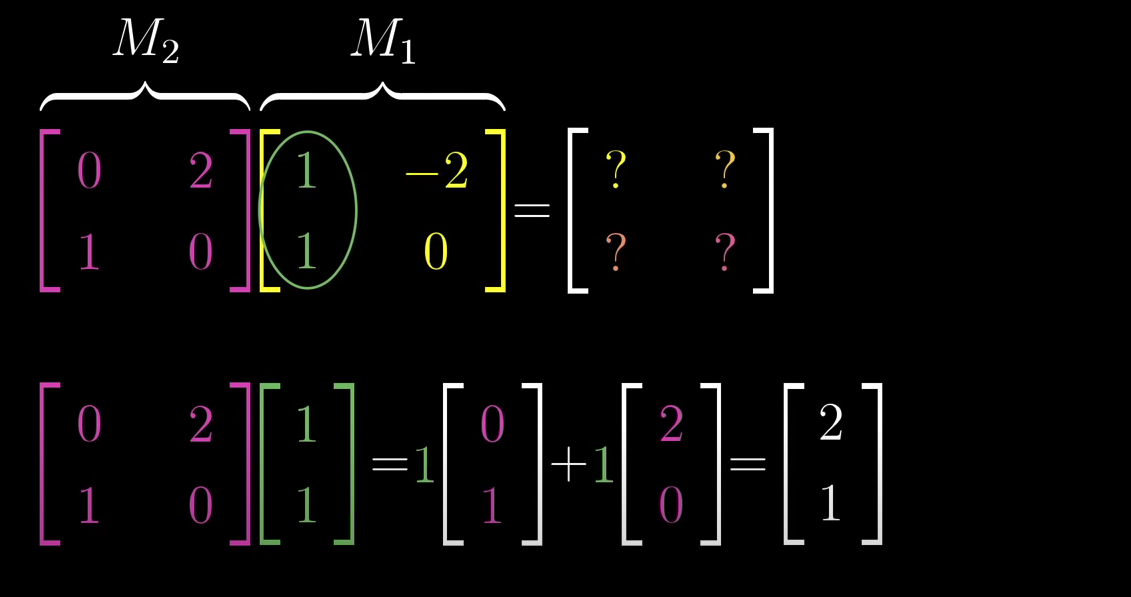
谈谈对透视矩阵的理解:矩阵是一系列坐标转换,一个 3D 坐标系中的物体,我们以上帝视角来看,是绝对的坐标,不管远近,然而,因为视觉上的需求,需要做“透视”,即远近大小看起来不一致(想象一下火车头和火车尾)。即将绝对坐标转换为视觉坐标。
var gl = null; var msg = "Your browser does not support WebGL, " + "or it is not enabled by default."; try { gl = canvas.getContext("experimental-webgl"); } catch (e) { msg = "Error creating WebGL Context!: " + e.toString(); }
在绘制之前,首先要创建一对矩阵。一个矩阵用于定义正方形在 3D 坐标系统中的位置(相对于相机),这个矩阵同时包含相机位置和模型位置,称为模型-视图矩阵。在例子中,沿着 z 轴负方向对正方形平移(当相机位置被移动,程序实际进行的处理是根据当前相机位置对整个场景进行平移)。第二个矩阵是投影矩阵,着色器使用它执行 3D-2D 坐标转换。示例中定义了一个 45 度视野的透视相机。我们用glMatrix 开源库来进行矩阵运算,现在我们放弃关心透视矩阵推导过程及背后的观察原理。
1
2
3
4
5
6
7
8
9
10
11
12
var projectionMatrix, modelViewMatrix;
functioninitMatrices(canvas) { // Create a model view matrix with object at 0, 0, -3.333 modelViewMatrix = mat4.create(); mat4.translate(modelViewMatrix, modelViewMatrix, [0, 0, -3.333]);
// Create a project matrix with 45 degree field of view projectionMatrix = mat4.create(); // perspective(out, fovy, aspect, near, far) mat4.perspective(projectionMatrix, Math.PI / 4, canvas.width / canvas.height, 1, 10000); }